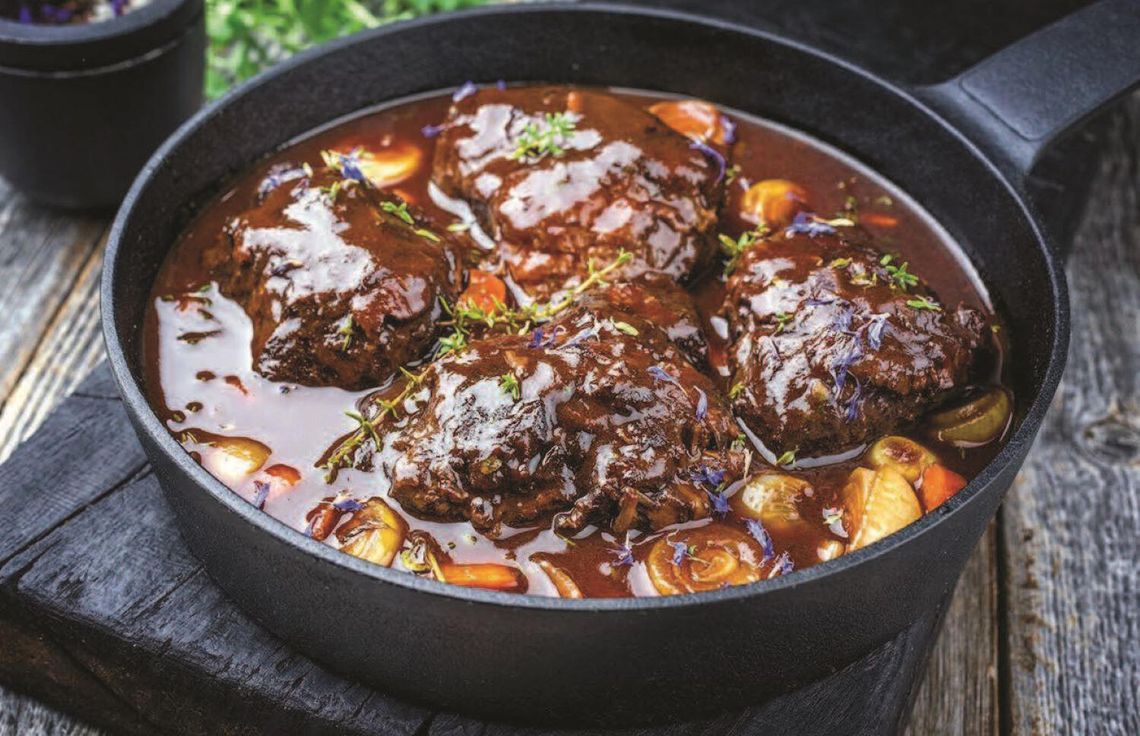
We have reached the turning of the seasons. Rain is in the forecast, pumpkin spice has hit Starbucks, and Halloween decorations are on the shelves. As a Fall Fan, I am thrilled. I am ready for acorn squash, all-day braises, and hearty stews. Bring on the stroganoff, cassoulet, and Bouef Bourguignon.
Cold-weather food is my favorite. There is magic in slow cooking–humble ingredients are transformed with time and care into the most delicious mouthfuls. At first glance, a braise might seem more challenging than grilling a steak or smoking a brisket, but once you know the basic steps nothing could be simpler. You don’t even need a recipe.
At its most basic, braising is the process of cooking a tough cut of meat in liquid at a low temperature for a long time. It is mostly a hands-off process leaving you free to watch football or do Sunday chores while your house is filled with the most delicious aromas.
Here are the steps to follow for a basic braise that yields spectacular results:
- Pick your meat. The best cuts of meat for a braise are the cheaper ones. The low-and-slow cooking process transforms chewy connective tissue into melt-in-your-mouth gelatin. My favorite cuts of meat to braise include beef short ribs, lamb shanks, chicken thighs, and pork shoulder. Remember, everything that makes a piece of meat bad for grilling makes it fantastic for braising.
- Start with a Sear. The first step in building a braise is to brown your meat. In a heavy-bottomed, oven-safe pot heat some fat until it is shimmering, season your chosen cut well with salt and pepper, then brown on all sides. Don’t be shy with this step. Your finished dish improves with the depth of the sear. Once you have a solid sear and all surfaces are well caramelized, set the meat aside to rest for a bit.
- Build Layers of Flavor. Your Dutch Oven or other pot is now primed and ready to develop fantastic flavors. The only hard and fast rule at this point is to include something from the allium family in your mix (onions, leeks, garlic, etc). Sauté something oniony for a bit then add in whatever other vegetables and aromatics your heart (and taste buds) desire. Root vegetables like carrots and potatoes are great choices and I always toss in some whole herbs like rosemary, thyme, and bay leaves. Cook your veggies until they are browned, making sure to scrape up the meaty bits as you go.
- Get Saucy. When you add in your chosen liquid, make sure to scrape the bottom of the pan to release all of the crunchy bits (this is called deglazing). You can add in whatever liquid you have available – red wine, stock, vinegar, beer, vermouth, even water will get the job done. Pour in a bit, wait for the “whoosh,” then get scraping. Put the meat back into the pot and add additional liquid until the meat is partially submerged. More liquid will yield a soup or stew, less liquid will result in a more concentrated sauce.
- Set It and Forget It. Once you have added all of your ingredients, bring the whole shebang to a boil, cover your pot with a tight-fitting lid, and stick it in a 300-degree oven. All there is left to do is wait. Slow and Low is the Tempo! Check your meat periodically. Smaller cuts like chicken thighs will be done in about 45 minutes, while larger cuts can take up to 4 hours. There is no hard and fast rule, let the meat be your guide. Collagen turns to gelatin at 185 degrees – that is the point where the meat will be fork tender and fall apart with a gentle nudge.
- Finishing Steps. You are absolutely allowed to eat a braise straight out of the oven. Or you can choose to reduce the braising liquid with an intense simmer on the stovetop. Garnish with some chopped fresh herbs and lemon zest; serve over something like mashed potatoes or polenta if you want; but whatever you do… ENJOY!















Comment
Comments